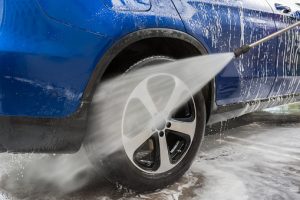
Using the Right Materials and Techniques for Exterior Car Wash
The importance of hand washing your car to get rid of winter-related road debris, grime, and salt has increased with the recent shift in seasons. The car can develop scratches and swirl marks if it is not washed properly. Additionally, if the wrong materials are used, the vehicle’s exterior may be harmed, costing you more time, effort, and money.
It is advised that you first clean your tires and wheels. If you wash and rinse your automobile first, water will need to remain on the surface of the car while you clean the four tires. Water stains may form where you just cleaned the tires when you are cleaning them. Because of how unattractive these spots are, you have to do extra work. In the event of splashes, it’s also a good idea to wash the wheels and tires before the car’s body.
Advice on Cleaning Tires and Wheels
One at a time, clean each tire. Clean tires won’t air-dry before you get a chance to return to them thanks to this procedure. Set aside two towels: one for the car’s body and the other for drying your wheels and tires.
Use the right cleaning products for the job. Utilize a cleaner made just for the kind of wheels you have. Brake dust, mud, and grime can be removed from wheels and tires using cleaners that are available on the market. A harsher cleanser might be appropriate if there are several pollutants that have built up on the surface.
Shine up those wheels. Your wheels can be protected from debris, grime, and other elements by waxing them. Maintenance will be lot simpler. The next time you need to clean your wheels, a fast rinse can be all you need.
Now that your wheels and tires are clean, let’s look at the right method and supplies need to wash your car’s body.
How to Wash Your Car in Steps
Place the car in a shaded area. Avoid washing in the sun. Heat hastens drying, which increases the chance of water stains.
Put the cleaning solution in one bucket and the clean water in the other. Using two buckets will allow you to thoroughly rinse and clean your cleaning mitt or sponge before reusing it with soap. Dish soap and hand soap should not be used because they are not intended for use on automotive paint. To help keep clean water at the top and dirt at the bottom of each bucket, grit shields can be placed in their bottoms.

Work your way down after beginning at the top. Usually, the areas near the bottom of the car are the dirtiest. If you clean your car from bottom to top, the surface will be covered in filth and grime. Instead of circling the sponge or mitt, wash in straight lines.
Clean and dry the vehicle. If working in a hot environment, rinse frequently to prevent water stains. To thoroughly dry the surface of the car, use microfiber cloths. Remember to clean the door jambs, as well as the trunk and hood jambs. Take another towel once the first one is wet.
Feel the surface, and if necessary, think about using a clay bar. When washing is ineffective, a clay bar can remove impurities from a car’s surface. To remove the embedded particles, therefore, use a clay bar if the surface feels rough to the touch. Watch this Chemical Guys video to learn how to clay bar your car properly.
Wax your vehicle. Waxing not only makes the automobile shine more, but it also shields the paint. Wax gives a layer of protection, preventing you from touching the paint directly when cleaning dirt.
How to Remove Bugs from a Car
Dryer sheets: Clean the bugs off by soaking them in warm water. Additionally, you can soak the dryer sheets in water from a spray bottle. Next, spritz the remedy on.
Spray WD-40 on the afflicted region. Allow to sit, then remove. Avoid spraying directly on the paint of the car.
There are many sprays available on the market specifically for getting pests off the front of your car. Pick the best option for you. Combine it with a bug sponge.
Leather Chairs Seats versus Fabric
Vacuum the seats. Whatever type of chairs you have, you should clean out the grit and crumbs from in between the gaps. If you don’t have a car vacuum with attachments, visit your neighborhood car wash or petrol station to utilize a coin-operated vacuum. In order to remove debris that is embedded in the crevices, a toothbrush can also be utilized.
Make use of a cleaning agent. Apply a professional cleaner or a homemade cleaning solution. Do a spot test on a tiny area before using your homemade solution for the first time. Avoid using cleaning solutions containing ammonia or bleach on leather seats since they could harm the material. You can agitate the dirt with a bristle brush and then wipe it away with a microfiber towel.
Apply a conditioner to leather seats. By replenishing the leather’s natural oils, a leather conditioner can help shield it from cracking and fading. After using the conditioner, leave the automobile in the shade for a full twelve hours to protect the seats from UV rays.
Messes should be cleaned up as soon as they happen, to avoid stains. Once a month should be plenty for seat cleaning. Your dashboard, steering wheel, and seats can all be kept safe with a windshield sun shade.

Advice on Maintaining Your Car:
Clean out all the crevices and crevices around it. Clean the trim lines and radio buttons with a cloth. To clean the air vents, use a paintbrush or foam brush.
Clear the seats’ undersides of trash. Shake off the floor mats after removing them. To get rid of any trash or debris that might be hiding beneath the seats, raise them.
Take anything extra out of the trunk. Remove anything from your trunk that you do not require. This will not only free up space for when you need it, but it will also reduce your gas consumption.
